Summary
– Step 1: Sand the damaged area
– Step 2: Degrease the area to be repainted
– Step 3: Protect areas that do not need to be painted
– Step 4: Apply a coat of primer
– Step 5: Painting
– Step 6: Varnish your touch-up
– Step 7: Polish your touch-up
Accident, malicious or bad luck: a chip or scratch on your car can happen quickly. Not only do they make your vehicle lose value, but they also open the door to rust. So don’t take it lightly!
Here are the materials you need for minor panel repairs or to touch up the paint on a bodywork:
| Rag | a piece of old cloth |
| Degreaser | $6 approx. |
| Protective mask | $1 approx. |
| Sanding paper | Approximately $5 per 3 sheets |
| Sanding paper for sander | $5 about the 3 sheets |
| Newsprint paper | Collection |
To touch up your bodywork, use spray paint (primer, paint and possibly varnish). And above all, take your time: it’s the guarantee of a satisfactory finish. Order your paint in the exact shade of your car. You can also use a touch-up pencil, which is easier to apply, but the results can be disappointing. In all cases, you will also need to polish it to the end.
Caution: spray products are solvent based and very volatile. Even for a small surface, a paint mist will form. Therefore, choose a well-ventilated room to do your touch-up, put on a protective mask when painting and check that no delicate objects are around your work area.
1. Sand the damaged area
This step will allow you to regain a completely smooth surface. It is a long and meticulous work, which should not be neglected.
– If the sheet metal has started to oxidise, first remove all traces of rust.
– Sand the impacted surface first with a fairly coarse grit:
◦ You can sand by hand or with an orbital sander.
◦ Remove all paint chips. But avoid as much as possible reaching the sheet metal.
◦ Spill a few centimetres over the paint around the chip to break the edges.
– Then change to a finer grit and continue sanding with a circular motion. When you pass your hand over the paint, you should not feel any surface roughness. At this stage, the different layers of paint appear around your impact.
– Finally, don’t forget to dust well.
Tip: Apply the 100 rule for the different sanding steps. When sanding, start with 120 grit sandpaper and continue with 240 grit. By hand, start with 240 grit, then continue with 320 grit, up to 500 grit.
2. Degrease the area to be repainted
Apply degreaser on the sanded part with a soft cloth.
Caution: use dry and silicone-free degreaser.
If there is a dent, you can apply putty.
3. Protect the areas that should not be painted
– Use masking tape and newspaper to protect the parts of your car that are close to the damaged area, which should not be painted: windows, windshield, chrome handles, wheels…
– You can also protect the rest of the body with tape and newspaper. But be careful not to mark a perimeter too close to the affected area: you could create new demarcations along the adhesive.
4. Apply a coat of primer
This product will allow your finish paint to adhere well to the body.
Apply your primer by holding the can always parallel to the body, in thin and regular coats.
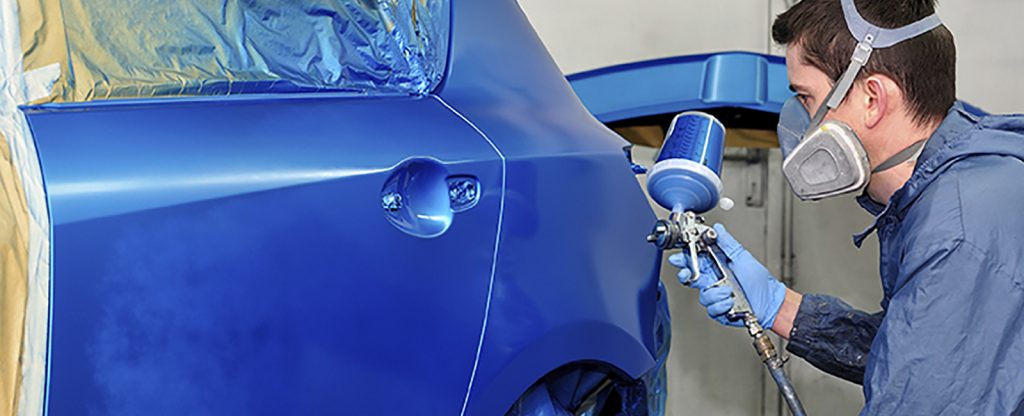
5. Proceed to paint the damaged spot
In the same way, apply your spray-paint layers:
– Always make thin layers to avoid drips on your touch-up spot.
– Apply the necessary number of coats until the sanded area is completely covered.
– Let dry well between each coat.
If your paint is a direct gloss, go directly to step 7. Otherwise you will have to varnish. Tip: To know what type of paint you are dealing with, apply polish on the body. If there is paint on your rag, it is a direct gloss.
Note: Order paint sprays in the exact colour of your original body. Garages, dealers or auto parts dealers offer this service. On each vehicle, the references of the original colour are inscribed, on a metal plate, a label or directly painted on the sheet metal. Depending on the car, the information can be located in the door, under the hood, in the trunk, under the spare wheel…
6. Varnish your touch-up
If your vehicle’s paint is two-coat, you will need to apply a varnish.
Proceed in the same way as with paint, in two coats.
7. Smooth your touch-up
To melt your touch-up with the old paint, polish all around the repaired area with polish. That’s it! You are done with the minor panel repair on your bodywork. If you do not feel confident about doing it yourself, you can contact THE AUTO DENTIST. They are the one-stop-shop for all your car dent and hail repair needs in Melbourne and they serve across Ravenhall, Hoppers Crossing, Werribee and Altona.


